"[I]f something is there, you can only see it with your eyes open, but if it isn't there, you can see it just as well with your eyes closed. That's why imaginary things are often easier to see than real ones."
--Norman Juster, The Phantom Tollboth, Scholastic (1961), p. 116.
Preparation
Due 12:00 AM before start of lab
Pre-lab assignment 4 (*.html)
Equipment
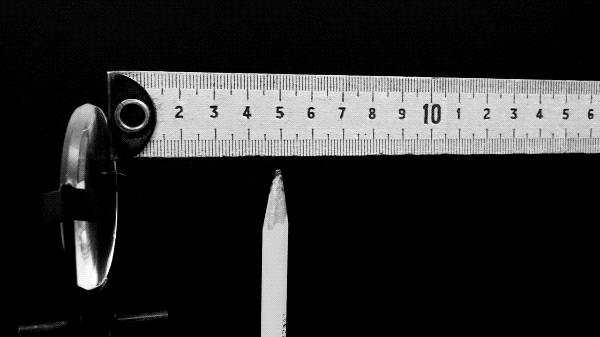
rulers (1 m stick, 12" straightedge)
optical bench
f ≈ +50 cm converging lens (*.gif)
illuminated arrow box
image screen
lens holder
thin rod
legal paper
laboratory laptop
Microsoft Excel
Big Ideas
Converging (and diverging) lenses can create virtual images visible by looking through the lens.
Virtual images are upright, but can either be enlarged or diminished with respect to the original object.
Virtual images are produced when object distances are less than the focal length of a converging lens, (or for any object distance from a diverging lens).
Ray tracings can be used to locate virtual images produced by converging (and diverging) lenses.
Data subject to experimental error can be estimated from the determining the range of values that produce a desired state, and represented graphically using error bars.
Goals
Students work in groups to observe formation of virtual images by a converging lens, in order to determine its focal length and model the image formation using a ray tracing.
Students learn how to handle data subject to experimental error from bracketing the range of lens-to-screen distances that result in a focused real image, calculate a representative percent uncertainty, and to display these using error bars on graphs.
Students build upon previous best practices to independently write an individual lab report, which can be submitted early, on time, or late depending on their personal initiative.
Tasks
(Optimally form groups of two students, three only if necessary.)
1. Experiment Set-up and Percent Uncertainty Trial
(Show calculations on worksheet to be checked-off; and to be included later in an individual, independent lab report.)- Clip your converging lens (approximate focal length f of +50 cm) to a lens holder, and mount at it one end of the optical bench. This position will not change for the remainder of the experiment.
- Mount a pencil (tip up) at a distance of 25.0 cm away from the center of the converging lens. This is your object distance do, and because of uncertainties in the least count of the meter stick, wobbling of the mounts, and/or the thickness of the lens, we will assume a reasonable uncertainty of 0.5 cm for this measurement.
Calculate the percent uncertainty of this sample object distance; this percent uncertainty will be assumed constant for all other data points (as this sample do value is near the mid-point of the data range):
Object distance percent uncertainty
= 100% × (0.5 cm)/(25.0 cm) = __________%.
- Look through the lens at the pencil tip, and verify that you are seeing a virtual image of the pencil tip (as it is upright, and located on the same side as the original object.)
Mount a metal rod vertically on the same side as the lens, somewhere behind the pencil. When looking through the lens at the virtual image of the pencil tip, when moving your head from side-to-side, you should notice that it moves from side-to-side, while simultaneously just above the lens (so you are looking at it directly) the metal rod is also moving from side-to-side. These "side-to-side motions" (due to parallax) will be different when the virtual image of the pencil tip and the metal rod are not "coincident" at the same location from the lens.
Slide the rod along the optical bench, either towards or away from pencil such that the rod (seen above the lens) appears to be move side-to-side together with the pencil tip (seen through the lens). If their side-to-side motions are identical, then the rod is then at the actual location of the virtual image of the pencil tip, and the distance from the center of the lens to the rod is the image distance di (which has a negative value, as it is on the same side of the lens as the original object).
Record this value, and move your rod at least 5 cm (to start over), and then have a lab partner find the virtual image of the pencil tip using the rod. Record your lab partner's image distance. Repeat until you have four measurements total.
(It's okay if these image distance measurements have slight variations, even for the same person, this is why the average and standard deviations will be calculated for multiple trial measurements.)
Location of image for object 25.0 cm away
| Trial → |
1 |
2 |
3 |
4 |
| image distance di (cm): |
|
|
|
|
- Calculate the average of these four measurements.
Average image distance di = __________ cm.
- Calculate the standard deviation σ of these four measurements, which is a measure of the "spread" of these data points (assuming that the error is random in nature). Use WolframAlpha (*.html) to calculate the standard deviation, by replacing the example numbers in the text box with your data points from above.
Standard deviation σdi = __________ cm.
2. Data Collection
(Show calculations on your own worksheet, to be checked-off; and to be included later in an individual, independent lab report.)- Develop an experimental linear trendline equation of how the inverse image distance (1/di) (dependent variable) depends on the inverse object distance (1/do) (independent variable). Refer to the example data table below to create your spreadsheet. Do not enter the "A..." column headings and "1..." row headings, as those are just spreadsheet "coordinates." Sample cell formulas to be entered below are highlighted in yellow.
For the horizontal error bars, use the "Error Amount > Percentage" option to enter the percent uncertainty value previously determined from the sample data point above, and for the vertical error bars, use the "Error Amount > Custom > Specify Value" option to select the standard deviation column for both the positive and the negative error bar values.
Object distance vs. image distance
(Note: fewer than 10 data points; due to laboratory time constraints)
| A | B | C | D | E | F | G | H |
| 1 |
Object distance |
Image distance di (−) |
Graph data |
| 2 |
do
(cm) |
trial 1
(cm) |
trial 2
(cm) |
trial 3
(cm) |
trial 4
(cm) |
(1/do)
(cm−1) |
mean (1/di)
(cm−1) |
std dev of (1/di)
(cm−1) |
| 3 |
16.0 |
|
|
|
|
=1/A3 |
=AVERAGE((1/B3),(1/C3),(1/D3),(1/E3)) |
=STDEV((1/B3),(1/C3),(1/D3),(1/E3)) |
| 4 |
18.0 |
|
|
|
|
⋮ |
⋮ |
⋮ |
| 5 |
20.0 |
|
|
|
|
⋮ |
⋮ |
⋮ |
| 6 |
22.0 |
|
|
|
|
⋮ |
⋮ |
⋮ |
| 7 |
24.0 |
|
|
|
|
⋮ |
⋮ |
⋮ |
| 8 |
26.0 |
|
|
|
|
⋮ |
⋮ |
⋮ |
| 9 |
30.0 |
|
|
|
|
⋮ |
⋮ |
⋮ |
(Refer to the previous labs for instructions on how to generate a graph with independent and dependent variables with a linear trendline and error bars.)
- Print out one copy of your data table, and print out one copy of your graph (with trendline equation and error bars) for review by your instructor, who will check off this off for your in-class work. Then print out more data tables and graphs (and an *.xlsx spreadsheet transferred via USB drive, e-mail, cloud, etc.) for each person in your group to use to independently write an individual lab report to be turned in at the start of the next lab.
- Since this graph has an independent parameter of x = (1/do) and a dependent parameter of y = (1/di), then the thin lens equation can be expressed in terms of a linear equation:
(1/do) + (1/di) = (1/f),
x + y = (1/f),
y = −x + (1/f),
where the slope m of this trendline would be expected to be close to −1 (check to see if your graph has a negative slope!), while the vertical intercept b for the trendline should be the inverse focal length (1/f). Determine the experimental value of the focal length of your converging lens, with the appropriate number of significant figures (which should be two).
Converging lens focal length f = +__________ cm.
(If your focal length result is nowhere near the expected value of 50 cm, see your instructor.)
- Test the validity of the ray tracing model using your experimental converging lens focal length f, by drawing just one ray tracing (use a 4 cm actual = 1 cm drawing scale, so it can fit on a page), assuming a scaled 4 cm object height (scaled down to 1 cm), and using an object distance of your choice within your experimental data range that you have not directly measured yet (i.e., use do = 21.0 cm, or 26.5 cm, etc.).
Don't forget to scale the positions of the focal points by a factor of four as well! (You may use a different scaling factor as necessary to fit your ray tracing on a page.)
Measure the resulting ray tracing image distance, and scale it back up to the predicted image distance.
Comparison of predicted ray tracing and experimentally measured image distance
Object
distance |
Image distance |
Percent
error |
| predicted |
measured |
| +__ cm |
|
|
|
- On your individual worksheet, show your work in testing the validity of your ray tracing model by comparing the percent error between the predicted distance from the ray tracing and the measured experimental image distance. (This calculation will also be included in the conclusion of your independent lab report to be turned in during the next lab; this is for your instructor to check to see that you have taken all the necessary data in lab in order to write your report at home.)
- Documentation Rubric (task 2)
(Graded for the entire group)
| Score | Description |
| 3 | Sufficient amount of data points, graph/trendline and validation calculations complete, or very nearly so. |
2 | (No intermediate score possible.) |
| 1 | Substandard effort; insufficient data, problematic graph/trendline, validation calculations missing or incorrect. |
| 0 | Unacceptable or no significant effort. |
3. Independent, Individual Lab Report (checklist: (*.pdf))
(Due next lab)(You may either work on this during the rest of lab today, and/or later for homework.) Independently work on writing and complete an individual lab report, due next lab, which should include:- A descriptive abstract.
- Procedure (emphasis on materials used and how the experiment was set up (diagrams are okay), instead of step-by-step instructions).
- Data table, calculations and/or results (show work in calculating the focal length for the lens, your ray tracing, and percent error for the ray tracing and experimental image distance).
- Write out concluding statements regarding the validity of your ray tracing model by comparing the percent error between the predicted distances from the ray tracing and the measured experimental image distance. Include the specific relevant numbers in these statements, such that each can be read (and cited) on its own without referring to the above calculations and numbers.
(Refer to previous labs for suggested best-practice guidelines for each of these sections.) - Lab Report Rubric
(Due next lab; each student works on their individual write-up individually)
| Score | Description |
| 3 | (Essentially) complete, thorough, understandable, with very few or no corrections. |
| 2 | Minor problems; some corrections/revisions needed. |
| 1 | Minimally acceptable effort, essential/critical revisions needed. |
| 0 | Unacceptable or no significant effort beyond original experimental work. |
- Submission Modifiers
(Added/subtracted from lab report points)
| Modifiers | Description |
| +1 | Report is turned in "early" on the same day of data-taking; or in the first 10 minutes of the next lab. |
| 0 | Report turned in any other time during the next lab. |
| −1 | Report turned in the day after the next lab; up to one week late. |
| −2 | Report turned in more than one week late. |
(No negative net points are possible for a lab report; the lowest possible grade (after applying the submission modifiers) is zero.)
Follow-up
Complete this week's lab report and post-lab assignment, next week's pre-lab assignment, and review lab instructions.
Due 12:00 AM before start of next lab
Post-lab assignment 4 (*.html)
|